Make every message feel personal
Imagine receiving a restaurant reminder that says, "We look forward to seeing you soon." Helpful? Not really. But add the reservation date, time, and party size, and suddenly that message becomes much more useful.
Personalization tags in Klaviyo act as placeholders, automatically pulling customer information into your messages.
Explore the tabbed gallery below to see how a restaurant could use custom object data to personalize reservation reminders.
Reservation reminder
Hi {{ first_name }},
We're looking forward to seeing you!
Your reservation for {{ object.PartySize }} guests is confirmed for {{ object.ReservationDate }} at {{ object.ReservationTime }}.
See you soon!
Text
Hi {{ first_name }}! Your reservation for {{ object.PartySize }} is confirmed for {{ object.ReservationDate }} at {{ object.ReservationTime }}. We look forward to seeing you!
Need to make a change? Call us at (617) XXX-XXXX.
Visit us: https://klaviyo.com
Ready to give it a try? Open up the Templates page in Klaviyo, create or edit an existing template, and start building. If you need additional step by step guidance, check out insert custom object data into your templates in the Klaviyo Help Center.
Display the right object records
What happens when a customer has more than one reservation?
Let’s say Jenny has two bookings at the same restaurant: a confirmed birthday dinner for her cousin on November 6, and a canceled dinner with her friends from work on November 16, which she needs to reschedule. We wouldn't want her reminder to include the canceled reservation.
That's where object filters come in. They let you choose which records appear in a message based on conditions you set.
You can use object filters to display:
- A single record, like Jenny's next confirmed reservation
- Multiple records, like a list of upcoming reservations
- A count, like the number of active reservations a customer has
For Jenny, you could filter for confirmed, upcoming reservations and select the earliest date.
Remember: Unlike the flow filters from Lesson 3, object filters determine which records appear in a message, not who receives it.
For instructions, see How to use custom objects in templates.
Preview and validate your messages
Before sending a personalized message, make sure the right information appears for each recipient. Klaviyo's preview panel helps you catch missing or incorrect data before customers see it.
Click through the slideshow below to learn how to preview and validate your messages.
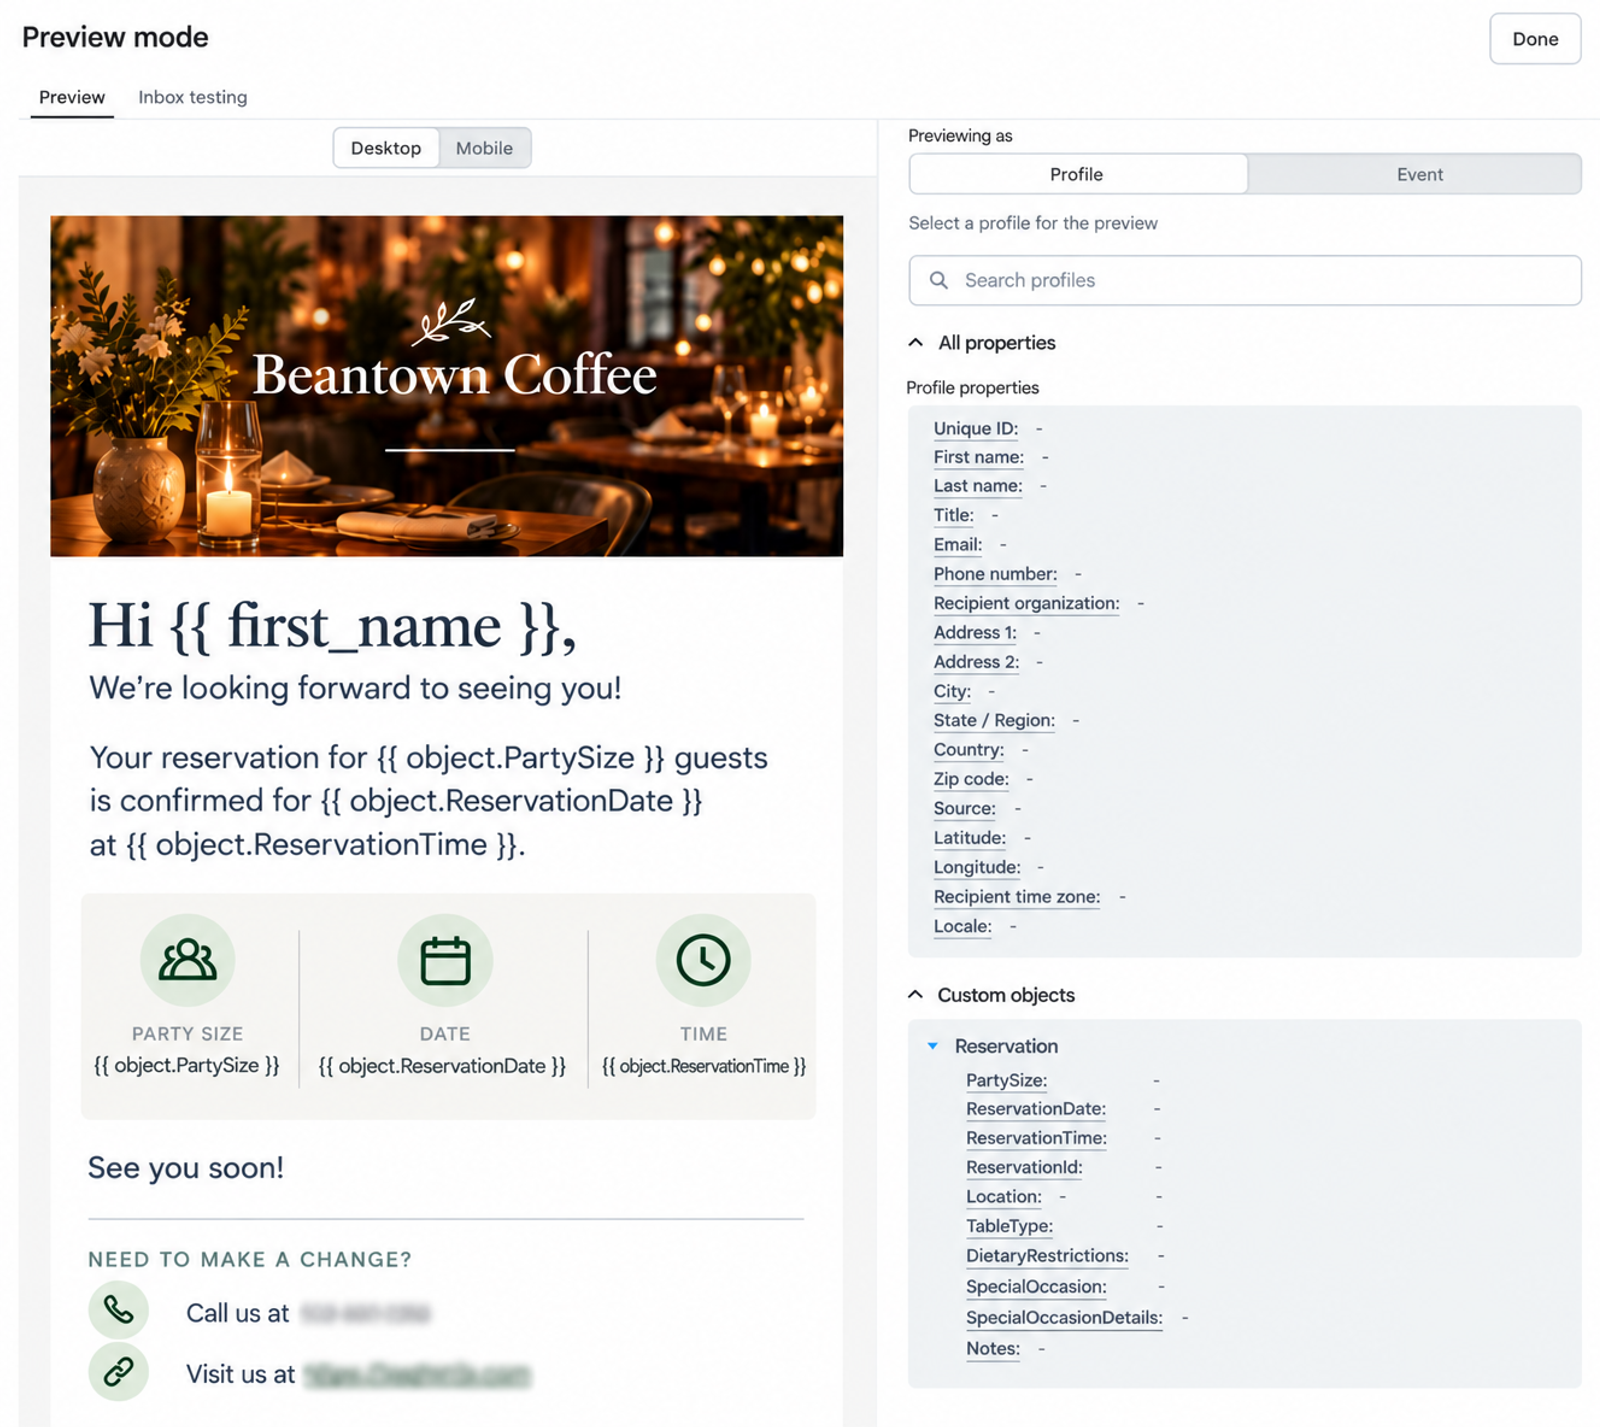
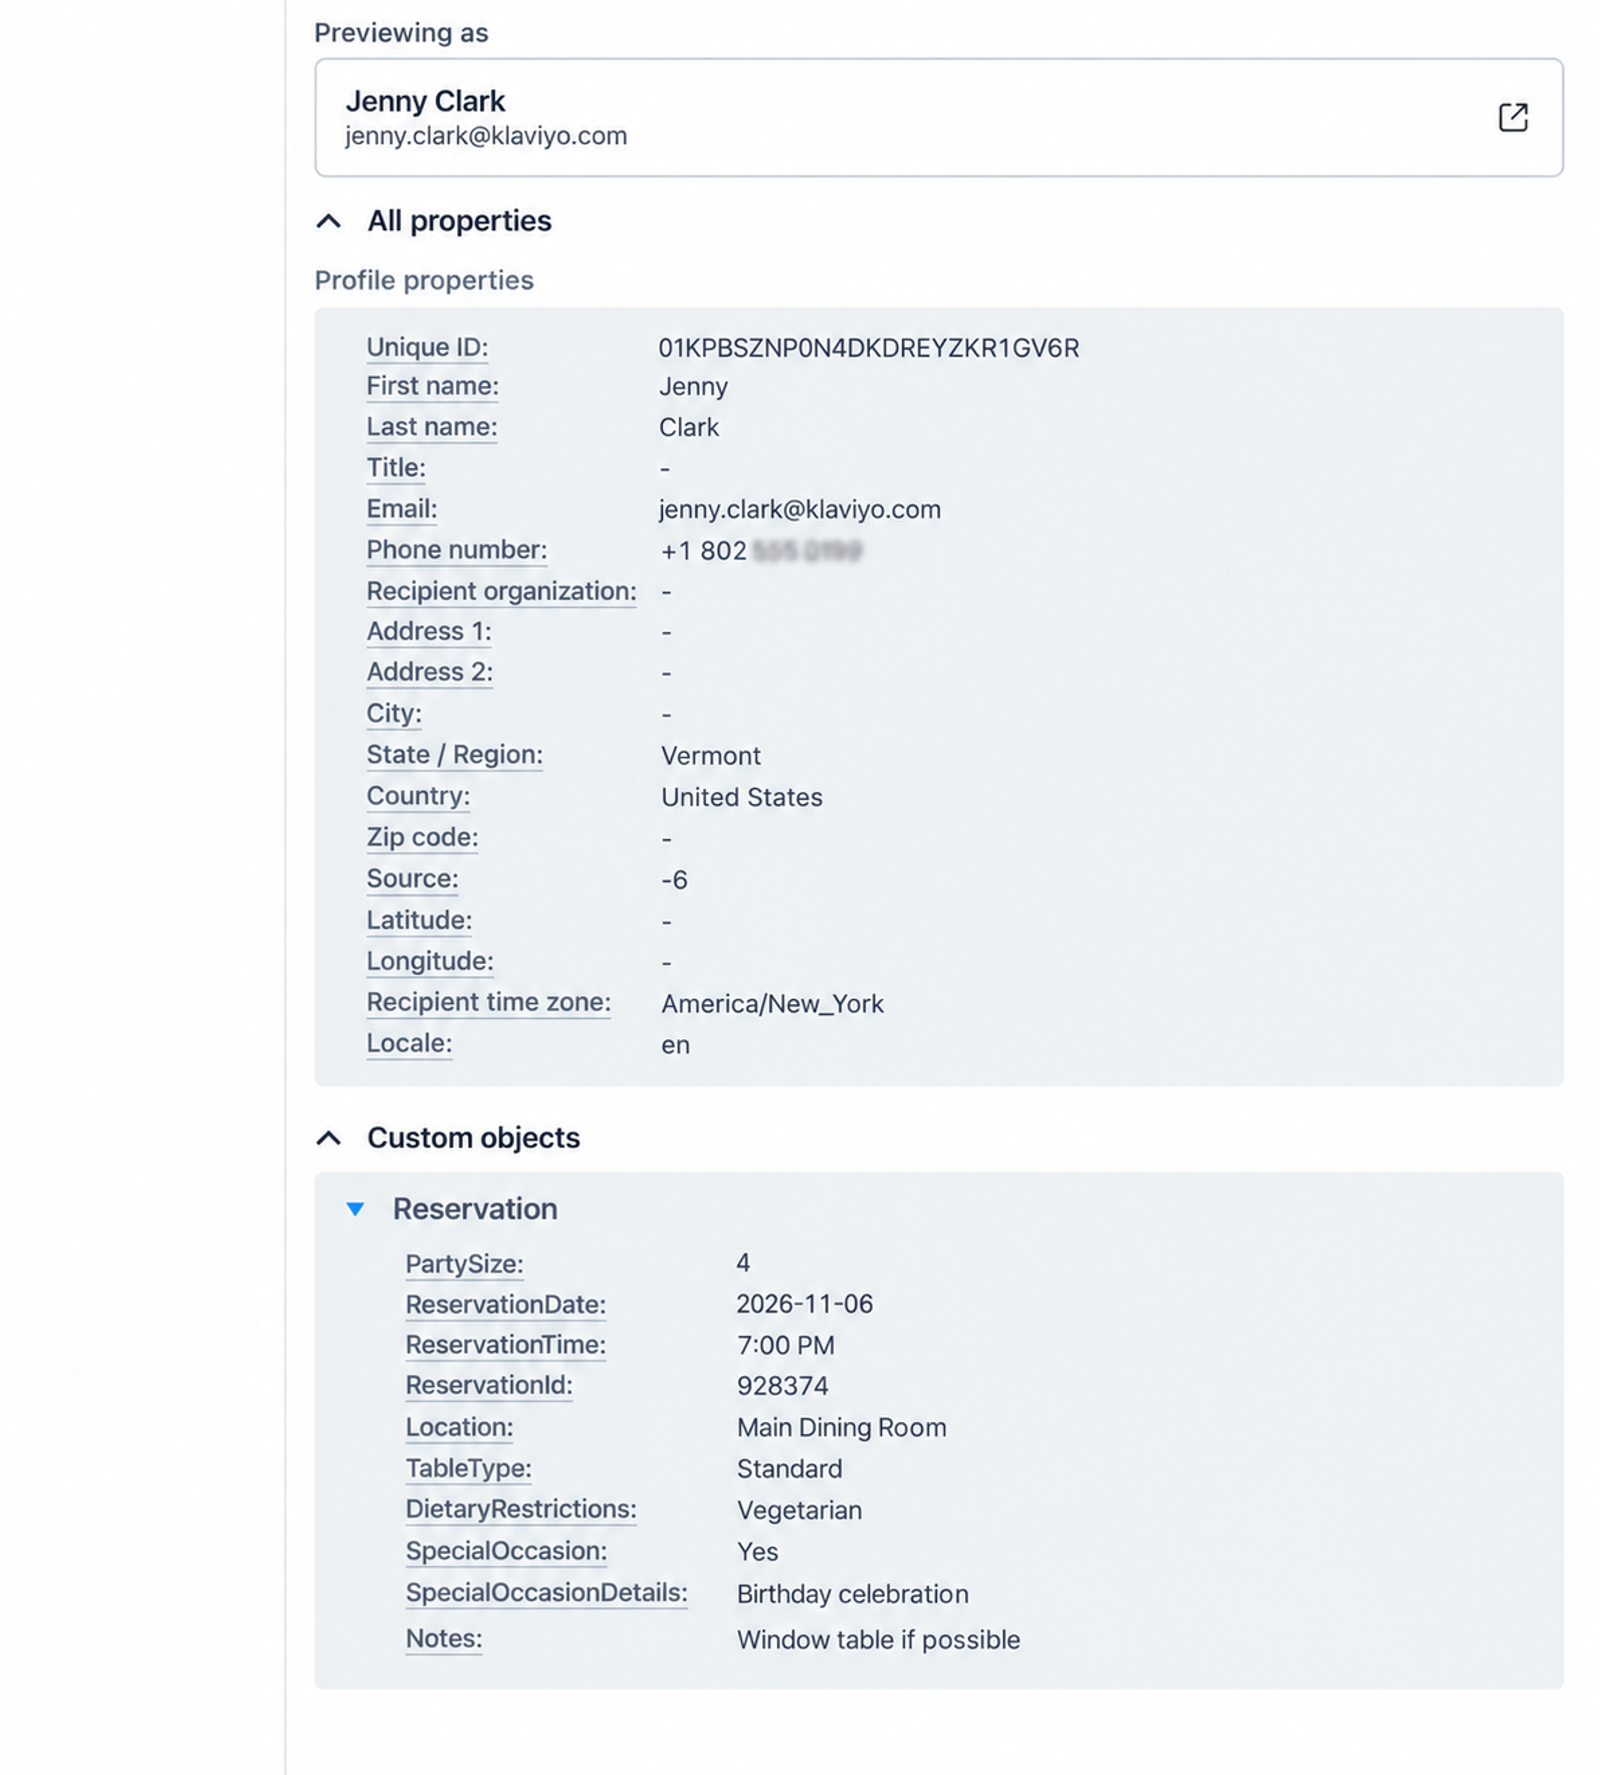
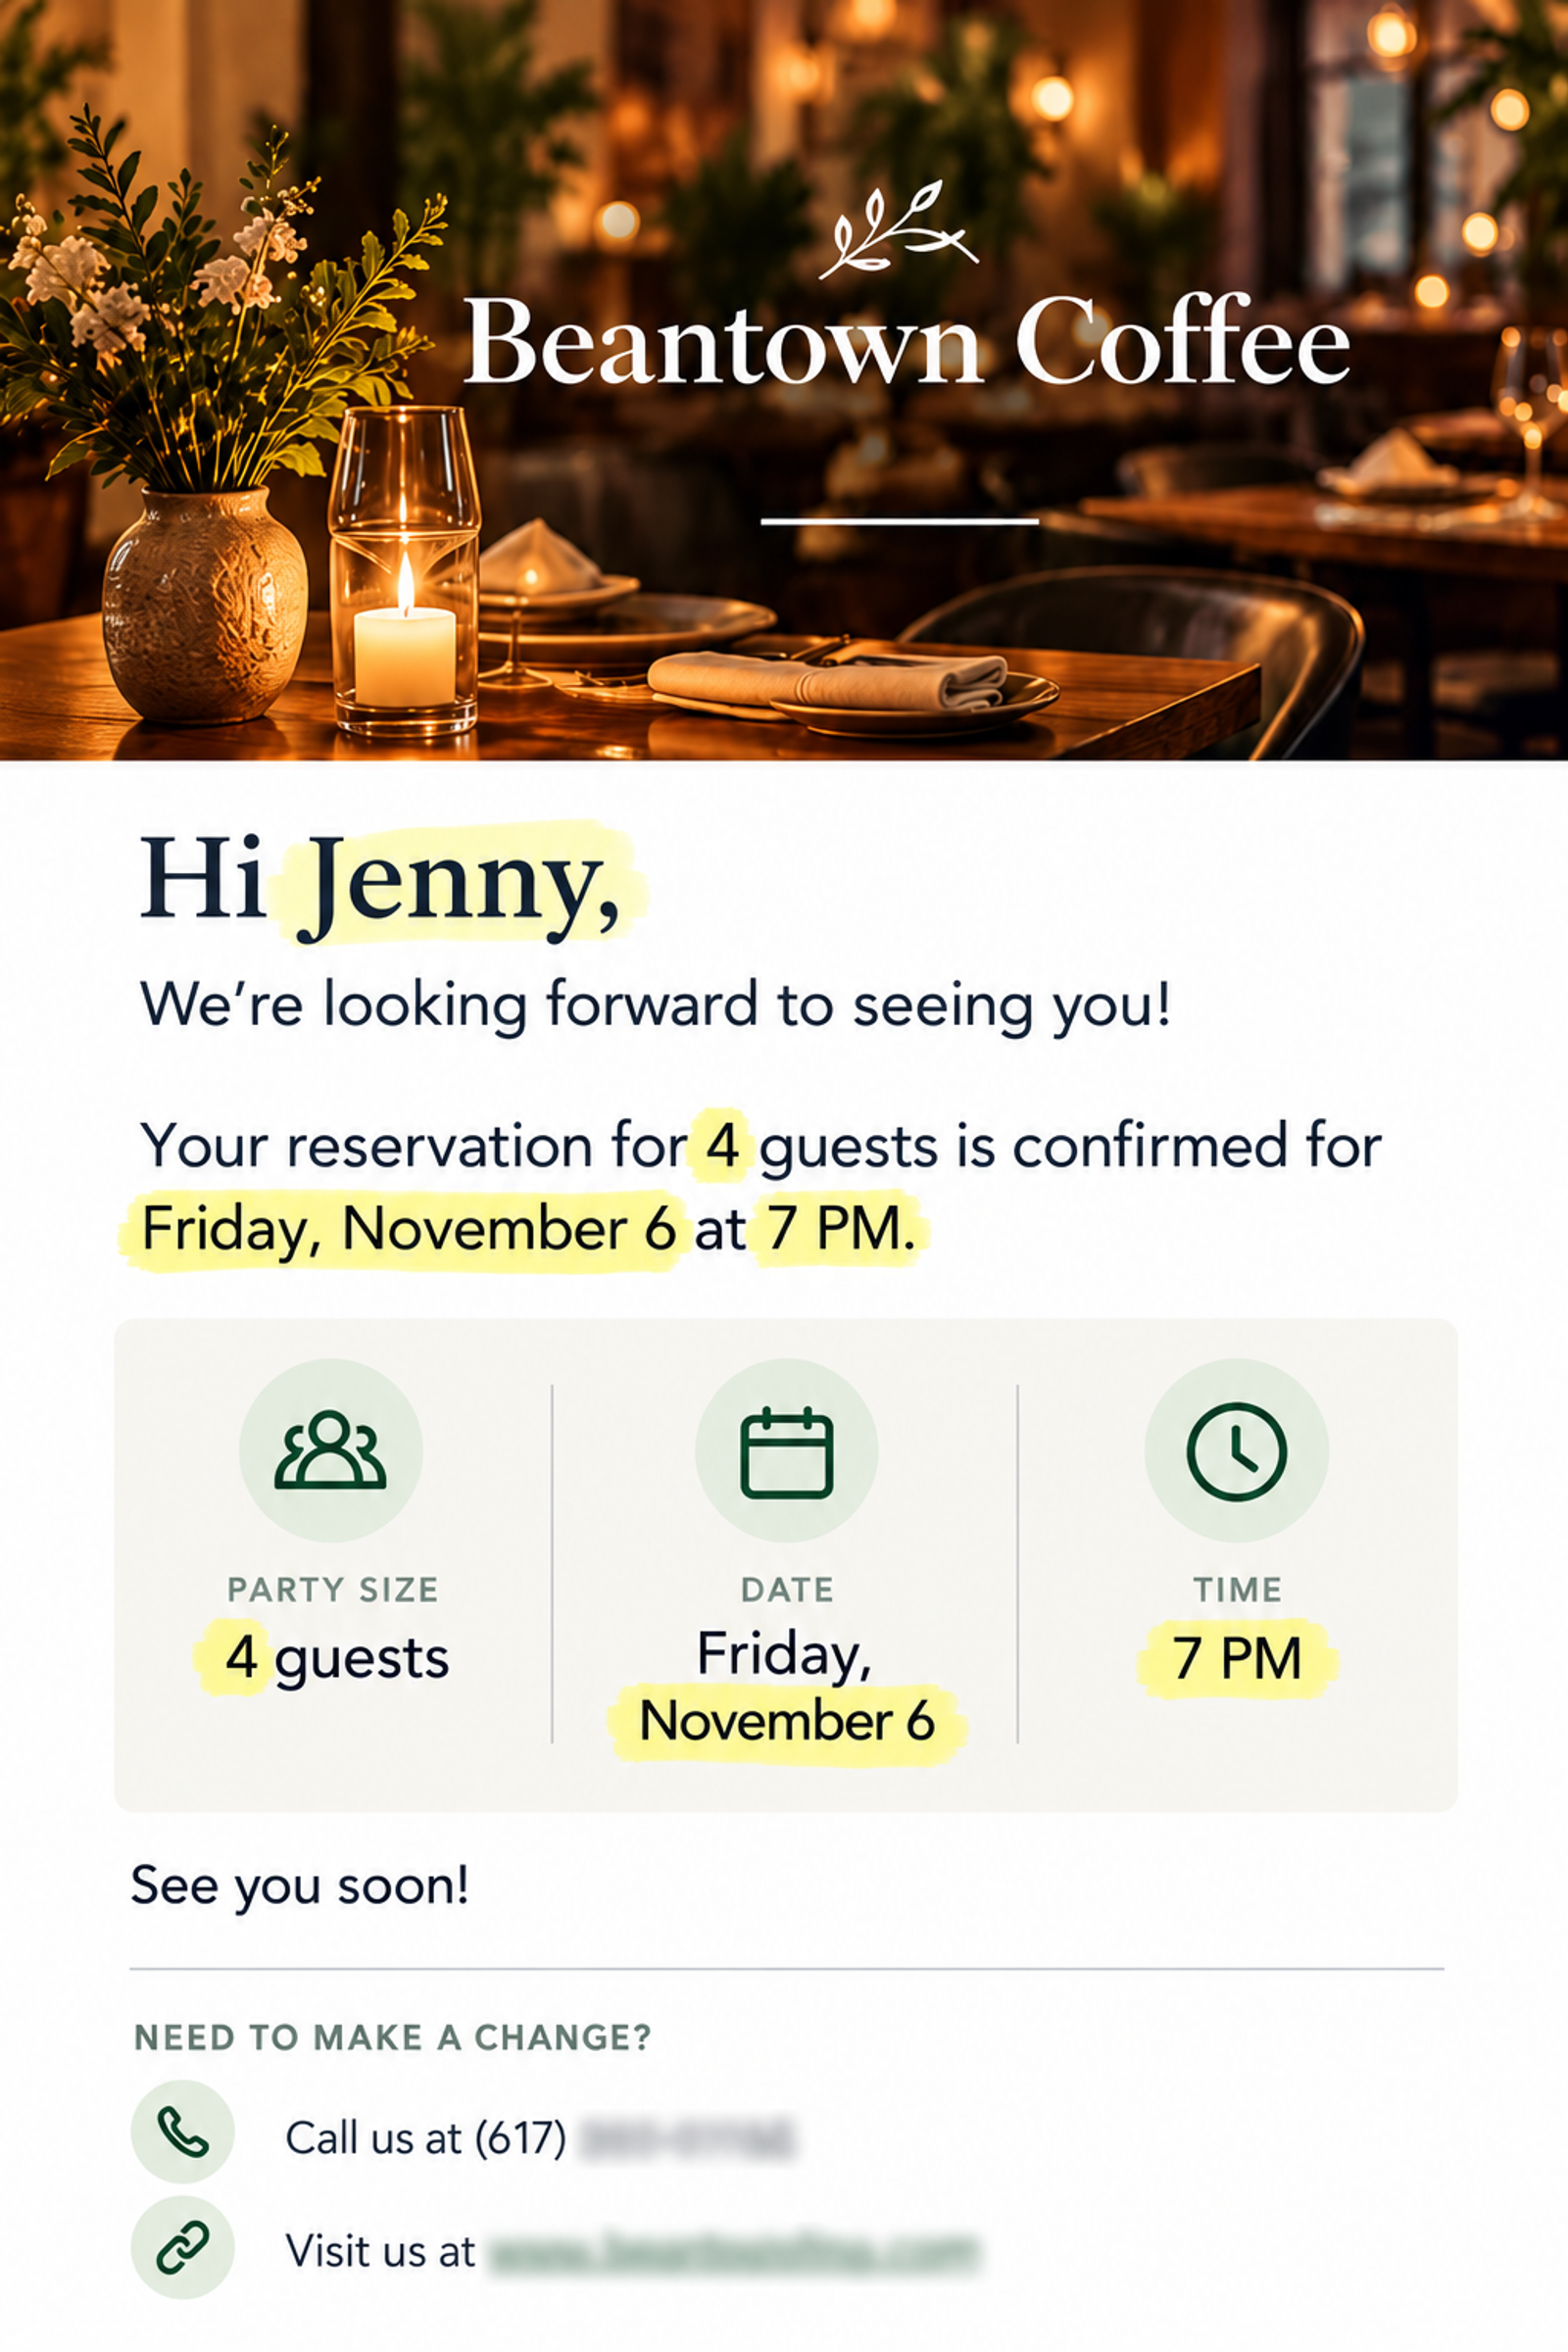
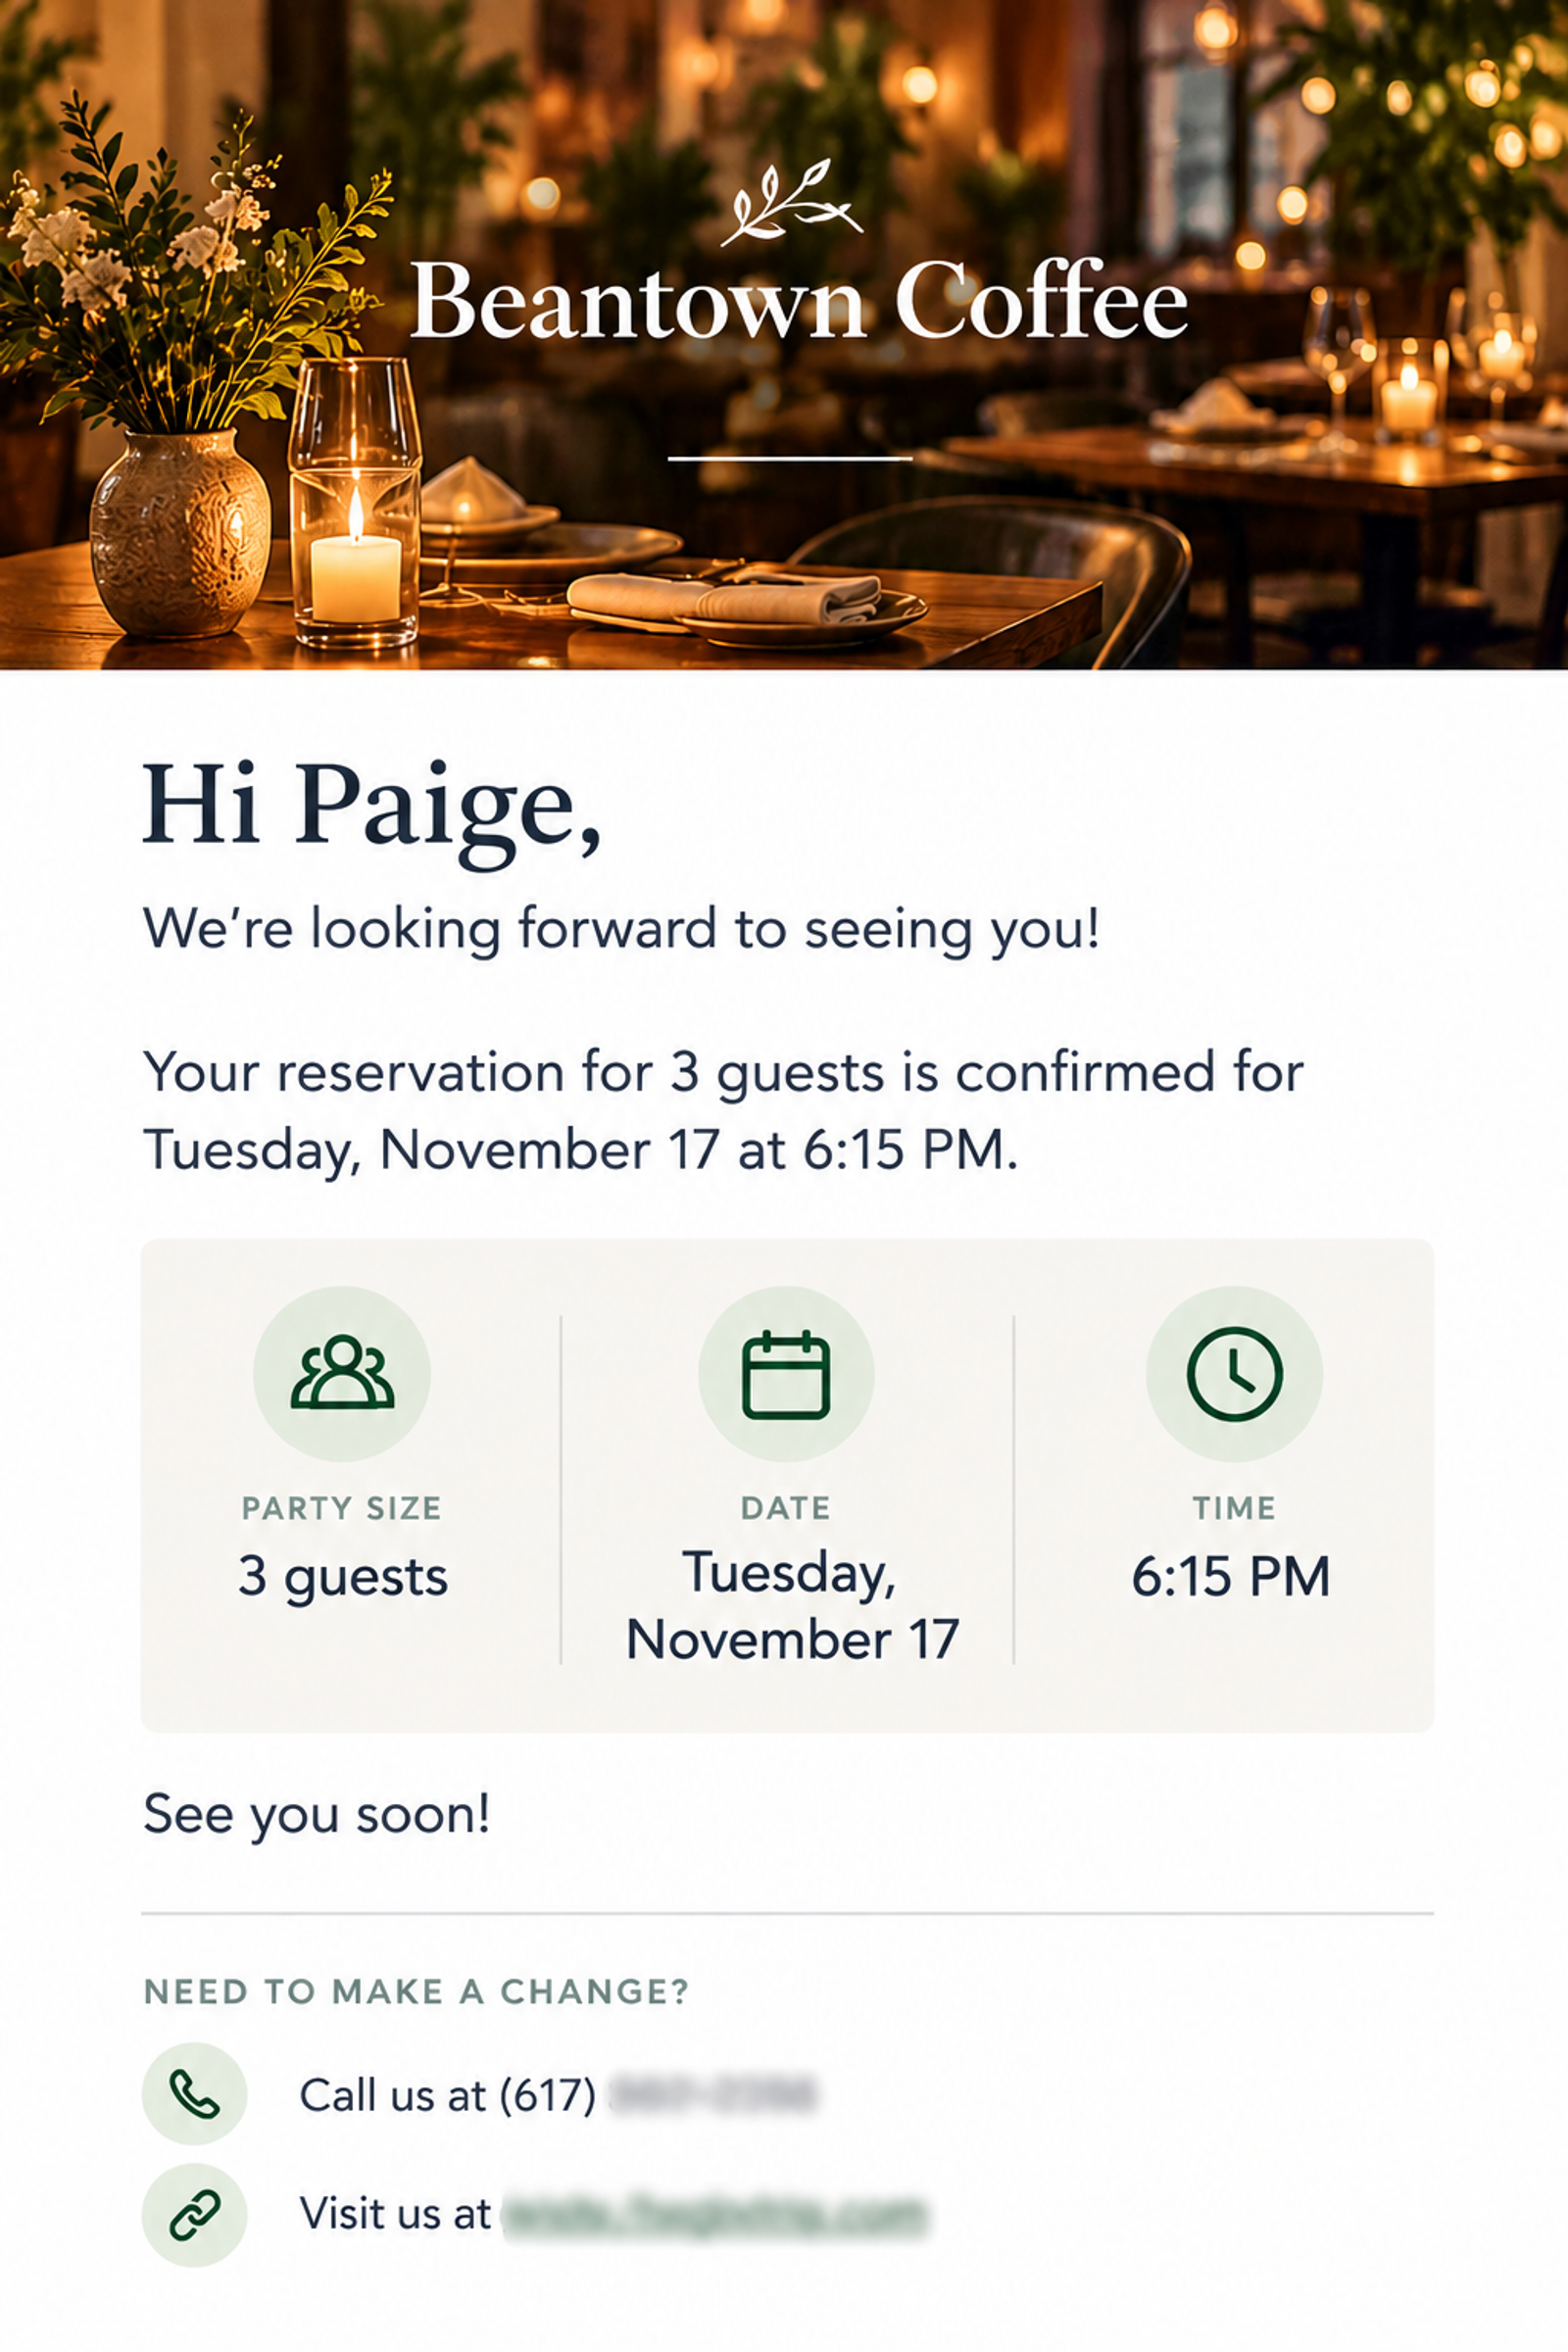
If something doesn't look right, review your personalization tags, object filters, and default values, and refer to How to use the preview panel for message personalization for additional guidance.
Choose the right personalization approach
You're creating personalized messages using custom object data. Sort each scenario based on the primary tool you'd use: a personalization tag to insert a specific value or an object filter to select which records appear.
Great job! In the next lesson, you'll learn best practices for using custom objects in Klaviyo.