Act on your custom object data
Imagine you run a pet supply company that sells food, toys, and other essentials for dogs. Using a Pets custom object, you can keep track of each customer's dogs, including their breed, age, and other important details.
Now, let's say you're planning a promotion on grooming products designed for Goldendoodles. Rather than sending it to every dog owner, you could build a segment of customers who own at least 1 Goldendoodle.
Your business may not be in pet supplies, so the custom objects you create and manage will depend on your business and its needs. For this example, though, let's walk through how to build a segment of customers who own Goldendoodles using the Pets custom object.
Set up the segment
- In Klaviyo, navigate to Audience > Lists & segments.
- Select Create > Segment.
- Give your segment a descriptive name, such as Customers with Goldendoodles.
- In the segment builder, select Properties about someone.
- Under the Object group, select Pets.
Define who qualifies
- In the Person row, select has at least one.
- In the where row, select the property breed. If the row isn't visible, select Add filter condition.
- Set the operator to Equals and select Goldendoodle.
- Select Create segment to save your segment.
Check your segment
Review your segment results to make sure you're reaching the right customers.
Someone with a Goldendoodle and a Labrador Retriever should qualify because at least 1 of their pet records matches the breed condition. Someone who only owns Labrador Retrievers shouldn't qualify.
With your segment created, you can send promotions featuring grooming products, toys, and other supplies relevant to Goldendoodle owners.
Create date-triggered flows using custom objects
Remember how hotels and restaurants used custom objects to track reservations in Lesson 1? Each reservation has its own record, including important dates like check-in or reservation dates.
With date-triggered flows, these businesses can use that information to automatically remind customers about upcoming reservations, helping reduce no-shows and keep customers informed.
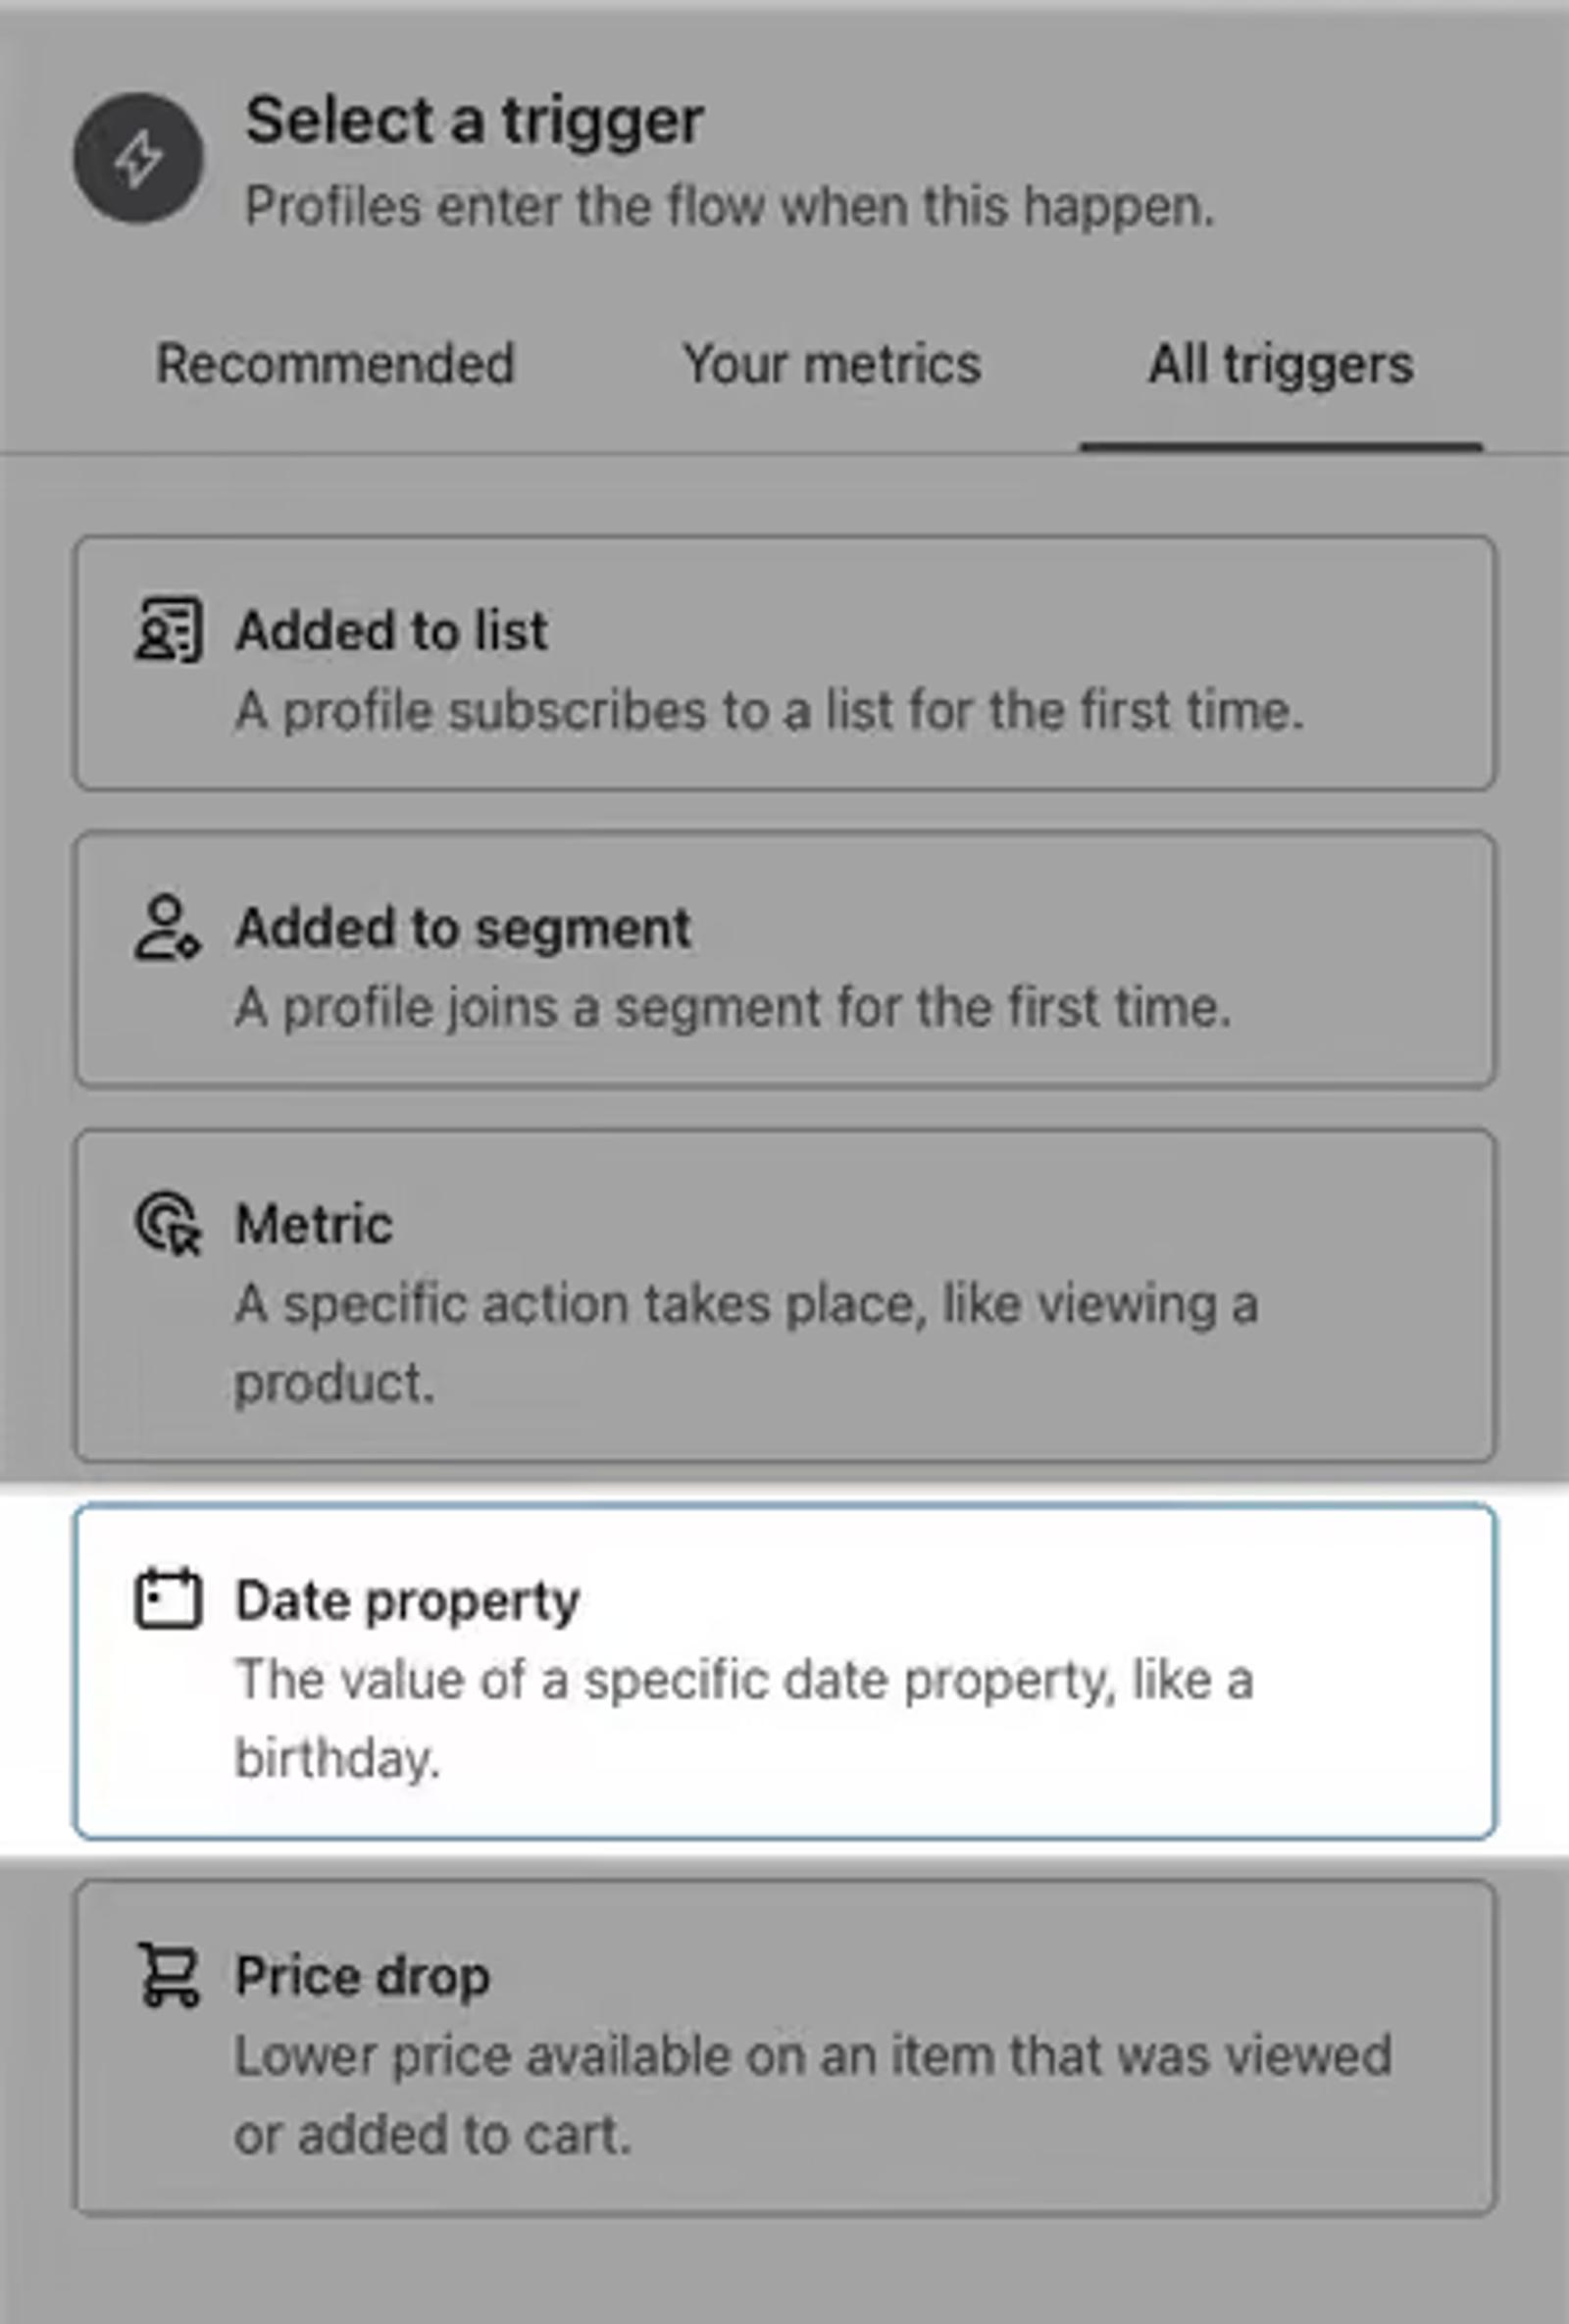
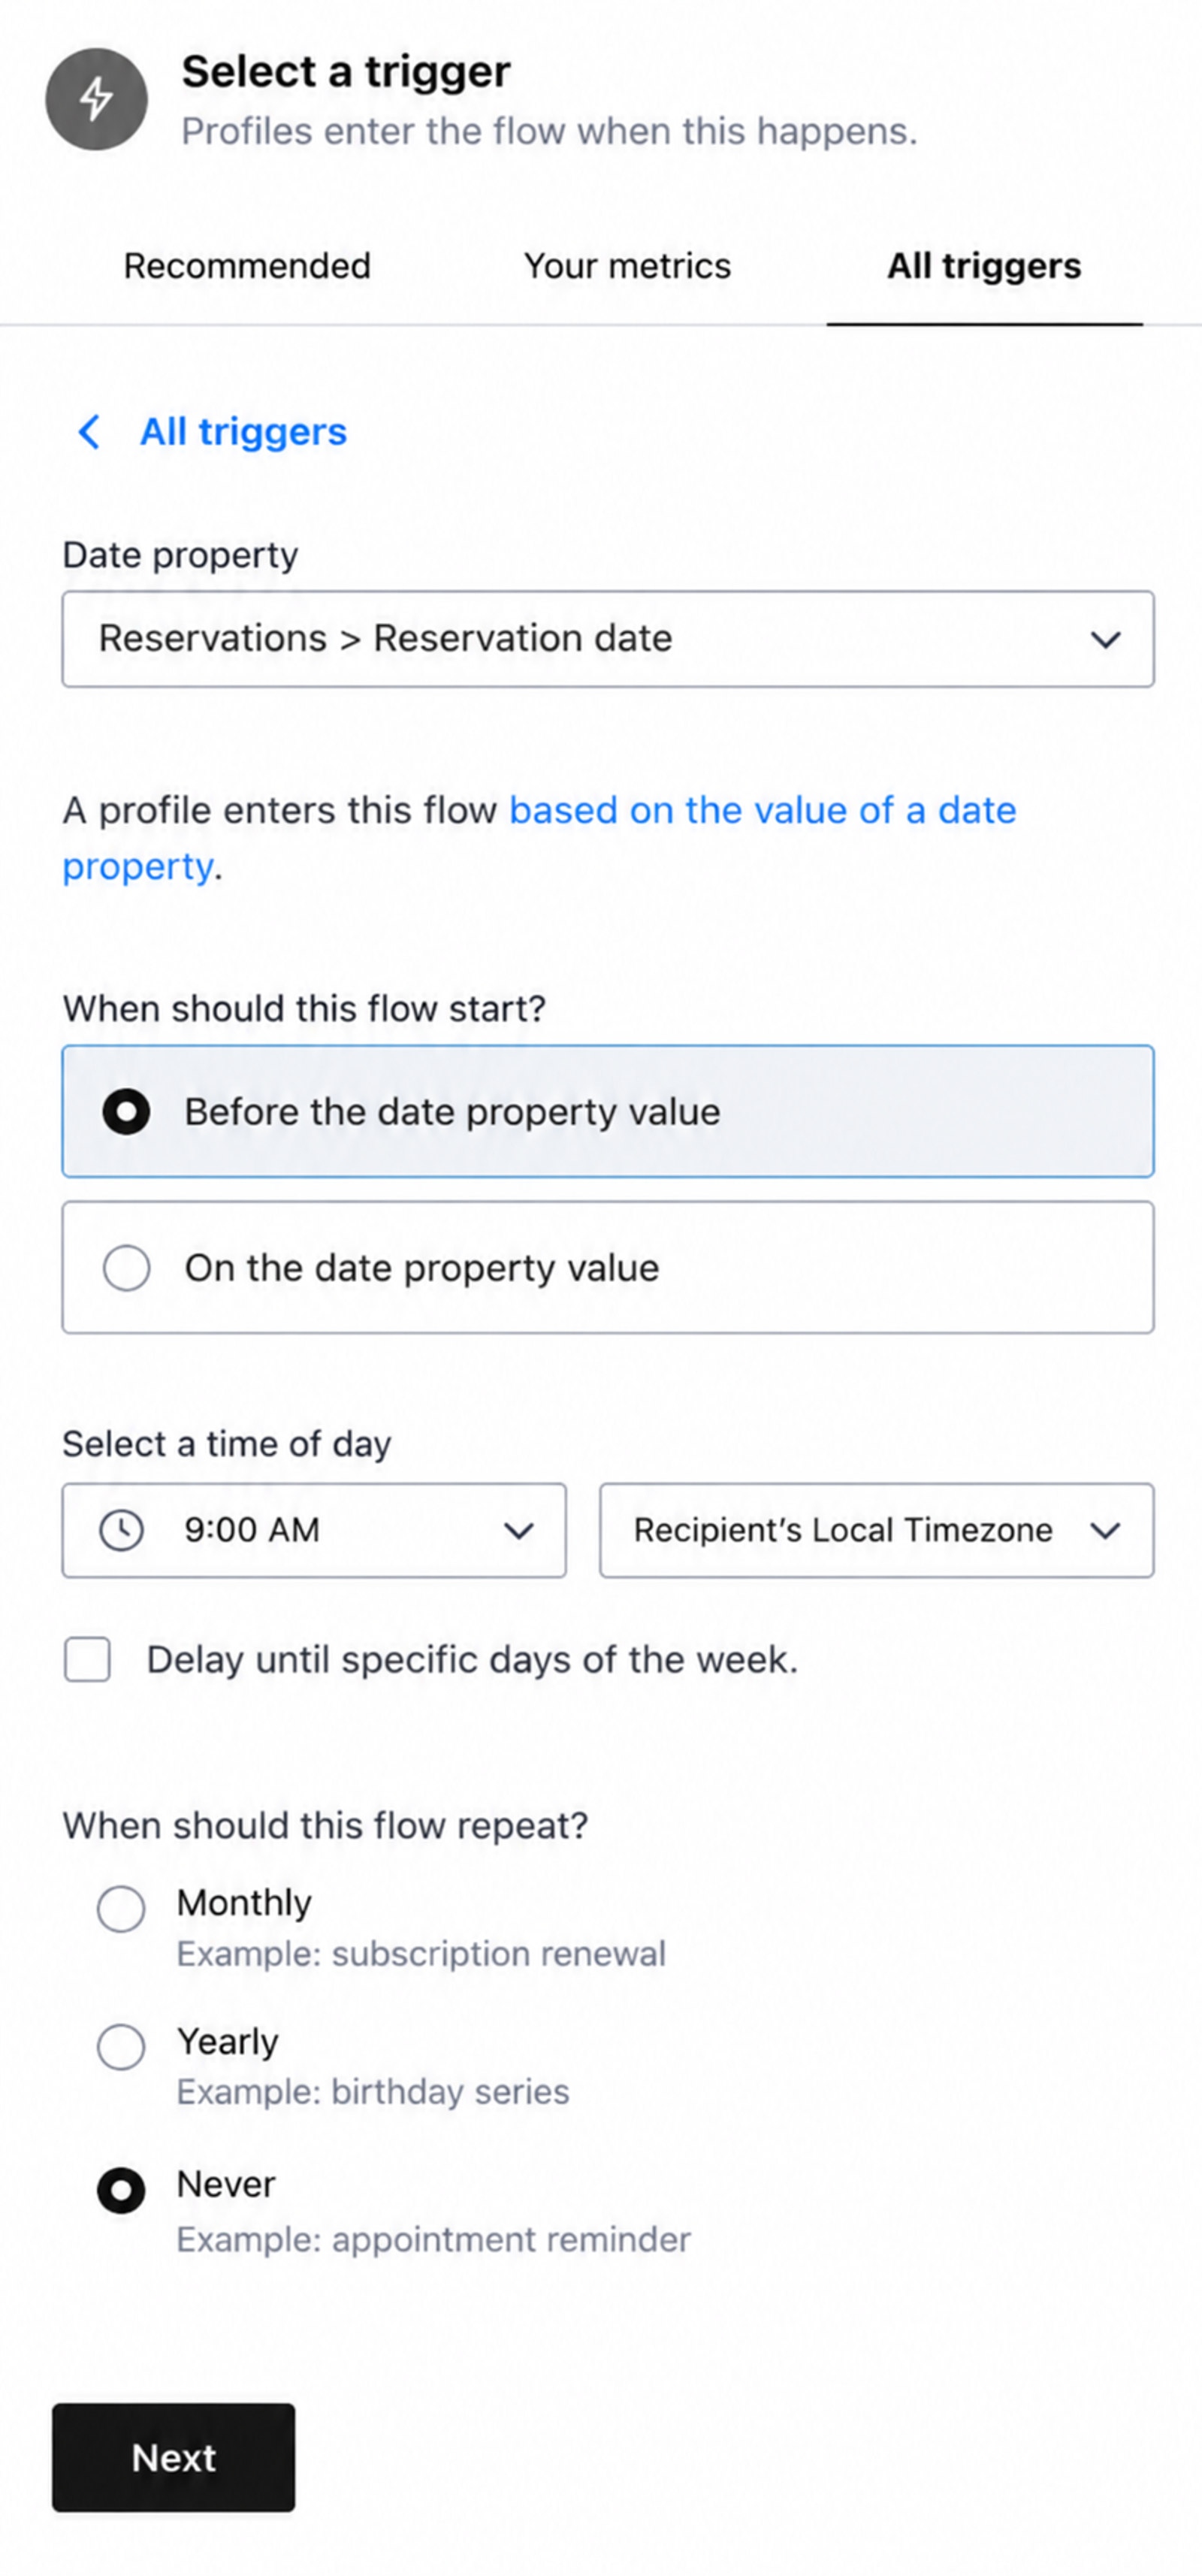
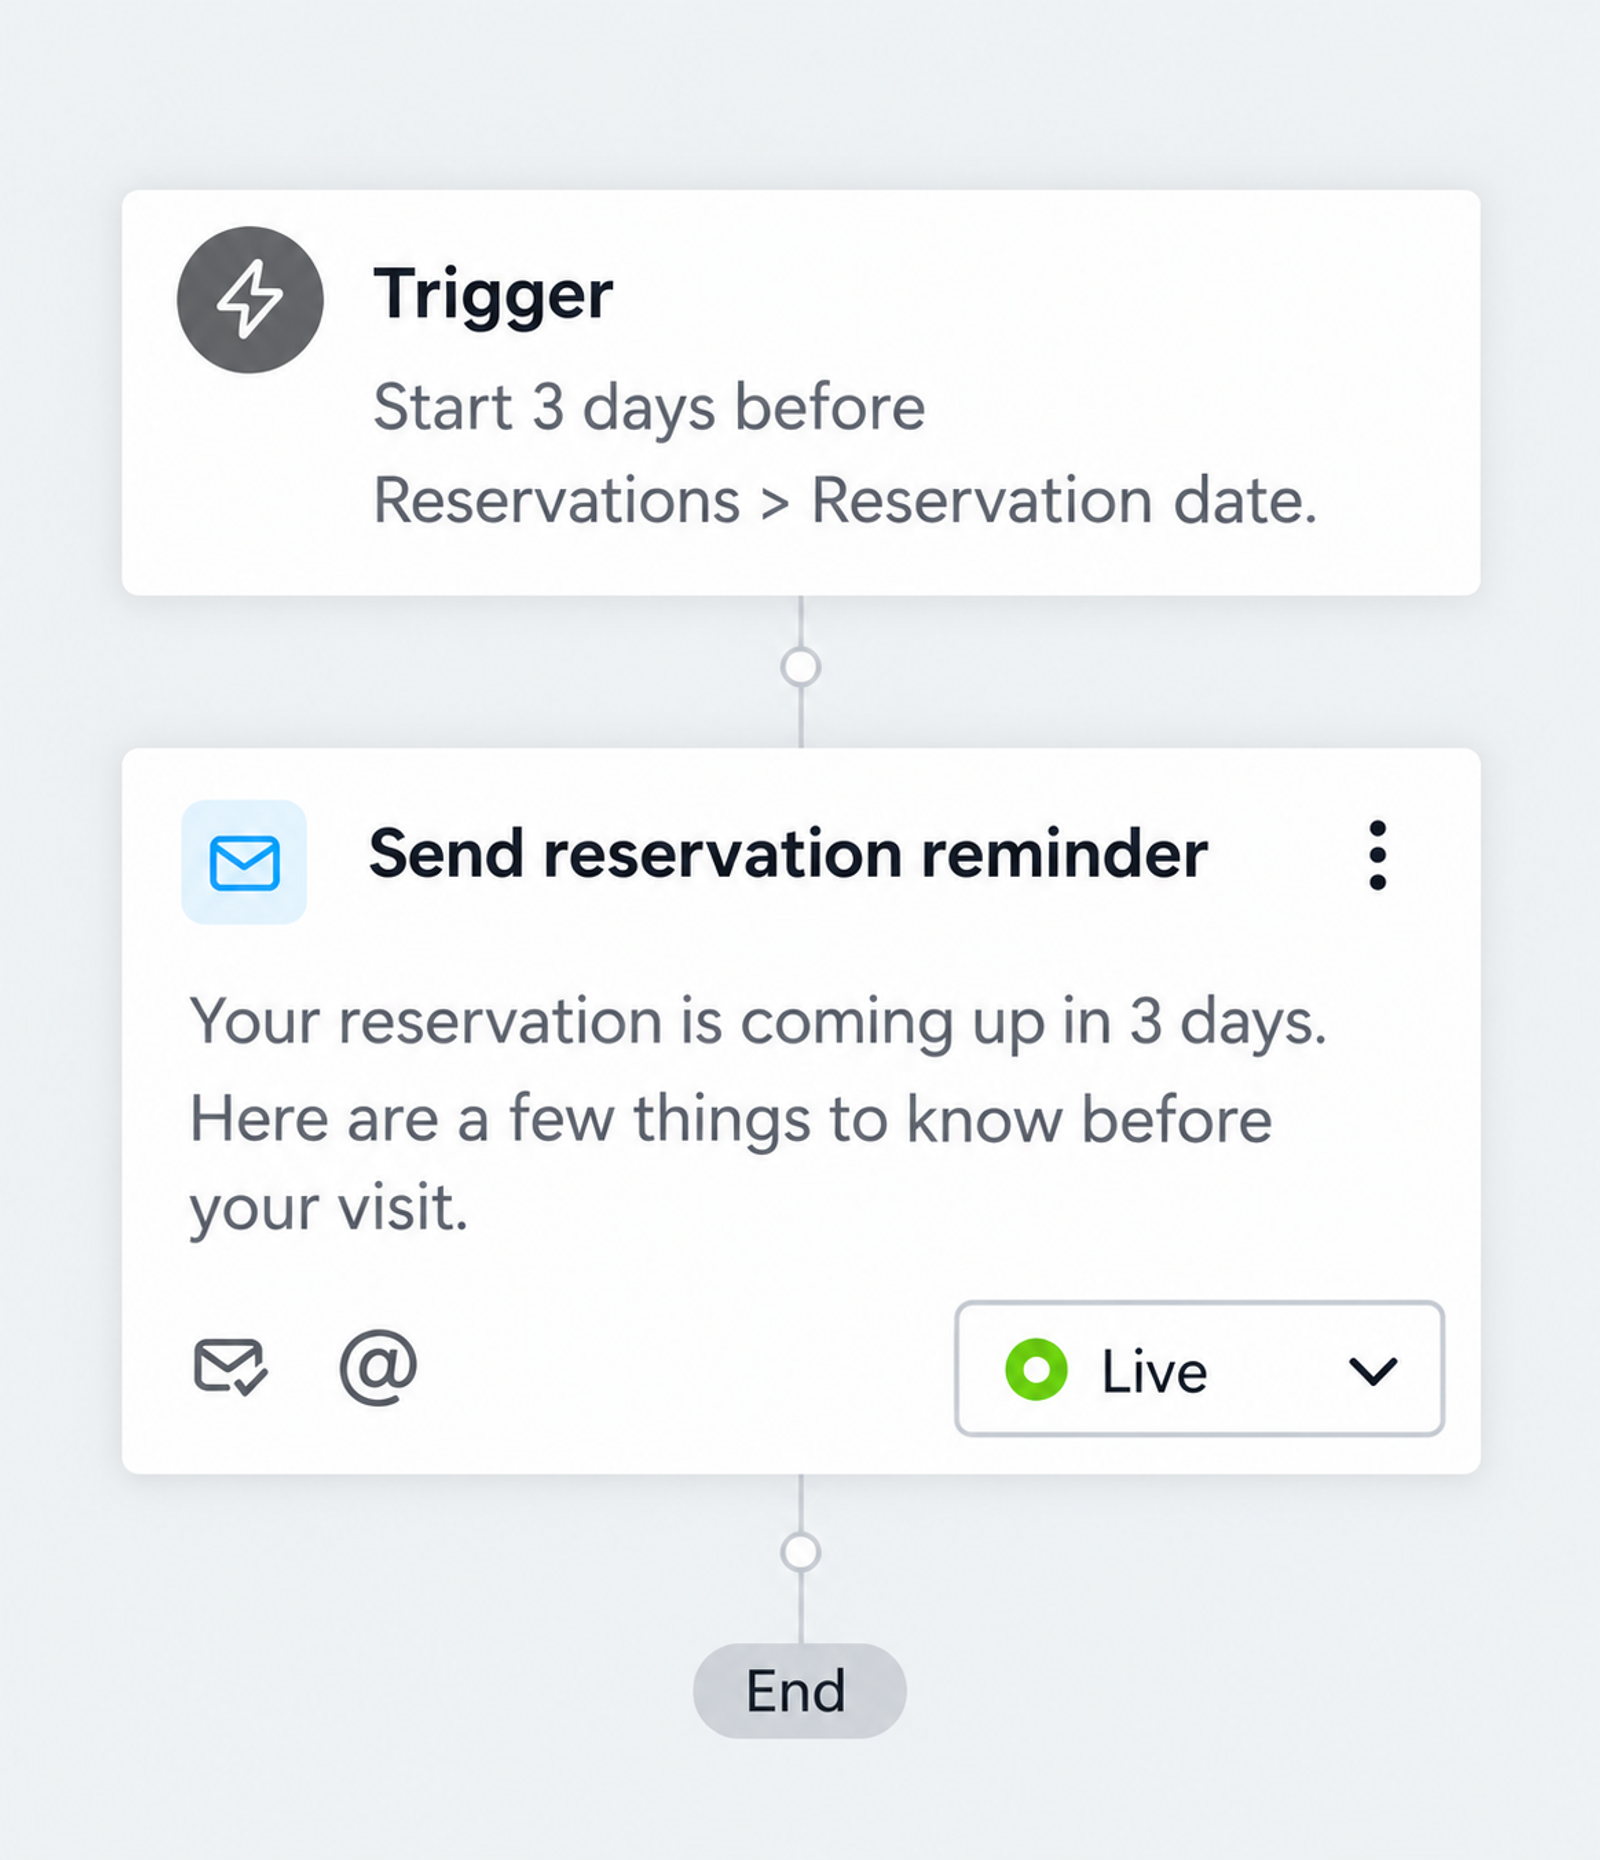
Click through the slideshow below to build a reservation reminder flow for a restaurant.
Refine your flows with filters and conditional splits
Your reservation reminder flow is ready, but what happens if a guest cancels their reservation? Or if a party of 10 needs different instructions than a party of 2?
That's where filters and conditional splits come in. They let you use custom object data to control who qualifies for a flow and what happens next.
Let's explore how each one works using our restaurant's reservation data.
Feature | What it does | Restaurant example |
Trigger filter | Controls which custom object records qualify to trigger the flow | Only allow confirmed reservations to trigger the flow |
Profile filter | Checks a customer's associated custom object records to determine whether they remain eligible for a flow | Only continue sending reminders to customers who have at least 1 upcoming reservation |
Conditional split | Sends customers down different paths based on their data | Send different instructions for large and small parties |
Want to explore these options further? Check out How to use custom objects in flows for more guidance on configuring filters and conditional splits with custom object data.
Filter reservations by status
Let's say a guest has two reservations: one confirmed and one canceled. You wouldn't want both reservations to trigger reminder emails.
To prevent this, add a trigger filter to your reservation reminder flow:
- Open the flow's trigger settings.
- Add a trigger filter using the reservation custom object's Status property.
- Set the condition to Status equals Confirmed.
Now, only reservation records that meet this condition will qualify to trigger the flow.
Choose the right tool for the job
Your restaurant wants to make its reservation reminder flow more targeted. Match each scenario to the Klaviyo feature that would help accomplish it.
You've learned how to use custom object data to build targeted segments, automate messages around important dates, and refine your flows with filters and conditional splits.
In the next lesson, you'll learn how to use that same data to personalize your messages, making each interaction more relevant to the customer receiving it.